How to Set Up Port Forwarding on Your Router (Safely)
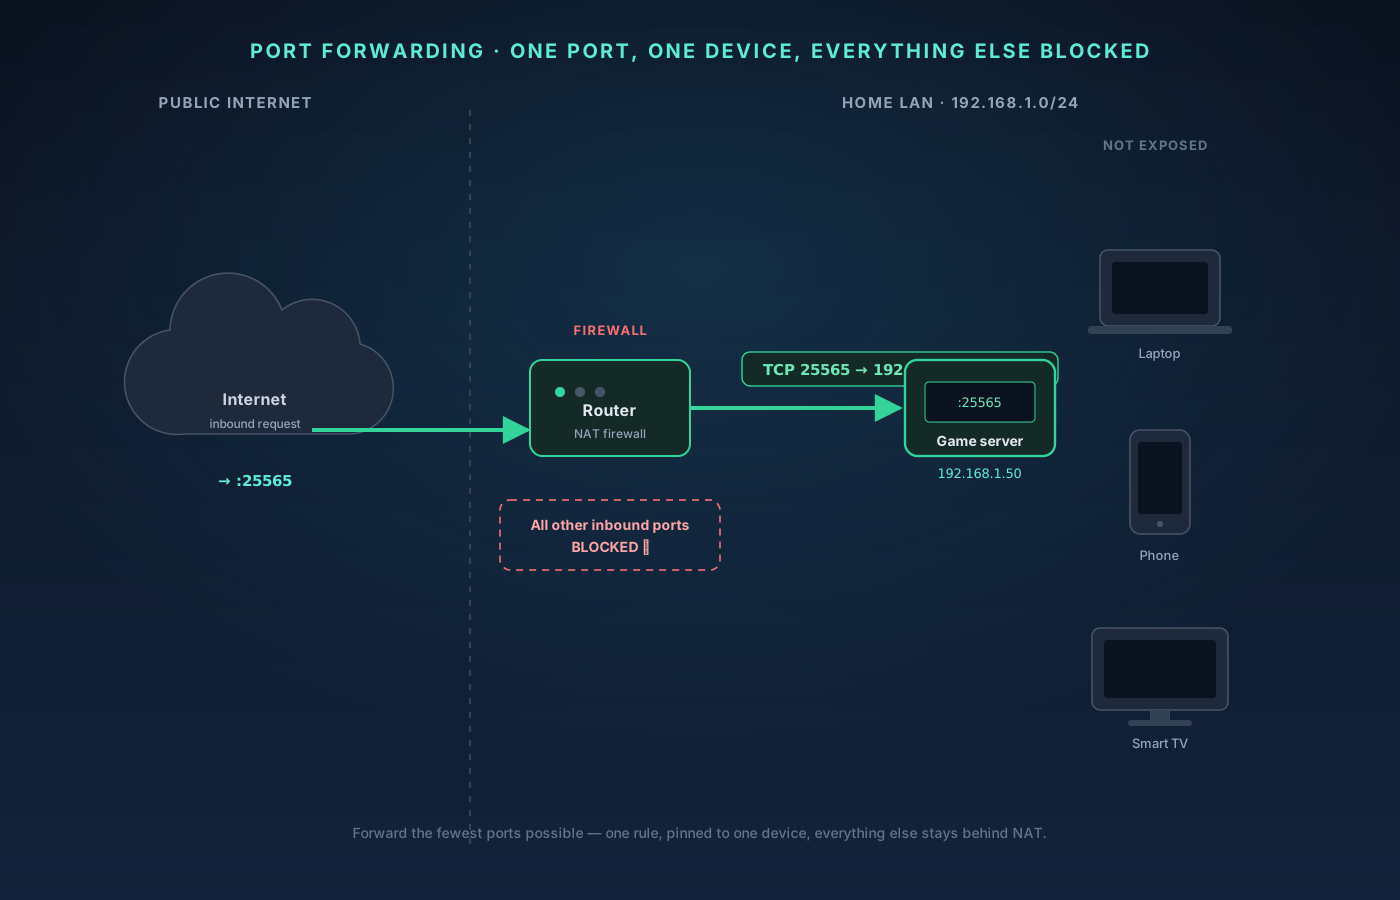
Port forwarding has a reputation for being fiddly, but the mechanics are simple: you tell your router "when a connection arrives from the internet on port X, hand it to this one device inside my network." The hard part isn't the setting — it's doing it safely, because every rule you add is a hole you've deliberately punched in the firewall that otherwise keeps your whole network invisible. This guide walks the full path: deciding whether you even need it, confirming your connection can be forwarded, pinning the target device so the rule stays valid, creating exactly one rule, testing it from the outside, and locking down whatever you just exposed. Budget 20–30 minutes; no command line required.
What you’ll need
- A computer or phone on the same network as your router
- Your router's admin login (the label is usually on the router itself)
- The device you want to reach from the internet (game console, PC, NAS, camera, or self-hosted server)
- The exact port number(s) and protocol (TCP/UDP) the service uses
9-Step Overview
- 1
Decide whether you actually need port forwarding
Port forwarding tells your router to accept an unsolicited connection from the internet on a specific port and hand it to one device inside your network. You need it when something outside must reach in — hosting a Minecraft or game server, running a self-hosted app you want friends to use, or exposing a service to a third party. You do NOT need it just to reach your own stuff remotely: a mesh VPN like Tailscale or a self-hosted WireGuard tunnel gives you full access with zero forwarded ports and a far smaller attack surface. If this is only for you, stop here and use a VPN instead.
- 2
Confirm you are not behind CGNAT or Double NAT
Port forwarding only works if your router holds a real public IP. Compare the WAN/Internet IP shown on your router's status page with the address at a 'what is my IP' site. If they differ, you are behind carrier-grade NAT (CGNAT) or Double NAT and no forwarding rule can ever be reached from outside. Fixes: put an ISP-supplied modem/router into bridge (pass-through) mode to remove the second NAT, or ask your ISP for a public/static IP (sometimes a paid option). If you are stuck behind CGNAT, a VPN mesh is the only realistic path in.
- 3
Find the target device's local IP and pin it with a DHCP reservation
On the device you want to expose, note its LAN IP (typically 192.168.x.x or 10.x.x.x). Then create a DHCP reservation in your router so that device always gets the same IP — reservations live in the router's DHCP/LAN settings and bind an IP to the device's MAC address. This matters because a forwarding rule points at a fixed IP; if the device's address changes on the next lease, your rule silently points at nothing (or worse, at a different device).
- 4
Log in to your router's admin page
Open a browser to your router's gateway address — commonly http://192.168.1.1 or http://192.168.0.1 (check the sticker on the router or run ipconfig/ip route to find the default gateway). Log in with the admin credentials, which are on the router's label unless you changed them. If you are still using the factory admin password, change it now: you are about to open a door to your network, and a weak router password undoes everything else.
- 5
Open the port-forwarding section
Look for 'Port Forwarding', 'Virtual Server', 'NAT Forwarding', or 'Applications & Gaming' — the label varies by brand (TP-Link, ASUS, Netgear, Ubiquiti, and ISP gateways all name it slightly differently). Avoid the 'DMZ' option, which exposes ALL ports on a device to the internet; that is almost never what you want and turns one device into a wide-open target.
- 6
Create the forwarding rule
Add a new rule with: a name you'll recognize; the internal IP (the reservation from step 3); the internal port the service listens on; the external port you want to expose (often the same, but you can map a different external port for a little obscurity); and the protocol — TCP, UDP, or both, exactly as the service documents. Forward only the specific port(s) that service needs. Do not forward a range 'to be safe' — every extra open port is extra attack surface. Save and, if required, reboot or apply.
- 7
Turn off UPnP if you don't need it
Universal Plug and Play lets apps and consoles open forwarding rules automatically without asking you. That convenience is also a well-known risk: malware and misbehaving apps can silently expose services. If you are forwarding ports by hand, disable UPnP in the router's NAT/advanced settings so nothing opens a port behind your back. Only re-enable it if a specific device genuinely requires it and you trust it.
- 8
Test the rule from outside your network
From inside your LAN a port often looks 'open' even when forwarding is broken, so test from outside. Make sure the service is actually running and listening, then check the port from a device on cellular data (not your home Wi-Fi) or use an external port checker such as canyouseeme.org. If it fails, verify: the service is running, the device's OS/software firewall allows that port, the internal IP still matches the reservation, and you are not behind CGNAT (step 2).
- 9
Harden the service you just exposed
Anything reachable from the internet will be scanned within minutes. Give the exposed service a strong, unique password (or key-based auth for SSH), keep it fully patched, and disable any default or guest accounts. Prefer putting the exposed device on an isolated VLAN so a compromise can't reach the rest of your LAN. Consider a non-standard external port to cut background noise, and if the service supports it, restrict access by source IP. Review your forwarding rules periodically and delete any you no longer use — a stale rule pointing at a forgotten device is a classic way in.